Setting up Okta SSO
Superusers can configure single sign-on to the runZero Console using an external SAML identity provider (IdP), such as Okta, which enables authentication and user access control to the runZero Console without typing in credentials.
Here are the high-level steps to set up single sign-on (SSO) using Okta to authenticate and manage user access to runZero:
Requirements
Before you can set up Okta SAML:
- Verify that you have administrator privileges for Okta.
- Verify that you are a superuser in runZero. Look for the yellow star in your account status.
Step 1: Add and configure runZero as an Okta app
- Go to Okta > Applications > Create App Integration.
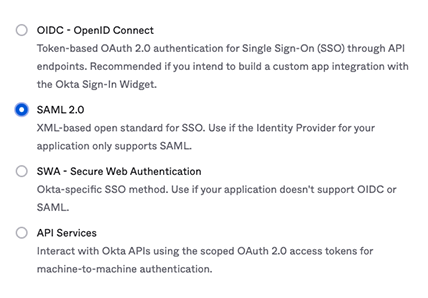
When the Create a new app integration window appears, select
SAML 2.0for your sign-in method.
- For the general settings, you’ll need to provide a name for the app. Call the app
runZero. You can also add a logo to make it easier for users to identify the runZero app. - For the SAML settings, you’ll need to go to the service provider information page in runZero to find the relevant URLs.
- Single sign on URL - In runZero, this is the assertion consumer service (ACS) URL.
- Audience URI or SIP Entity ID - In runZero, the entity ID, or SAML audience, will be
https://console.runzero.com.- NOTE: make sure to include the leading ‘https://’ when entering this field in Okta.
- For the remaining settings, like the attribute statements, visit the Okta documentation to learn how to configure them.
- When you finish configuring the SAML settings, Okta will prompt you for some feedback on how you will be using the app. You can opt to provide feedback or skip to complete the set up.
- After Okta creates the app, you will need to view the SAML 2.0 instructions to complete the set up. Go to the the Sign On tab for the runZero app and view the SAML 2.0 instructions. You’ll need these details for the next step.

Step 2: Set up SSO in runZero
- Go to the SSO setup page in runZero.
Choose one of the following modes to enable SSO:
- Allowed - Enables SSO, but users still have the option to sign in without SSO.
- Required - Requires users to sign in with SSO. Only superusers can sign in without SSO.
- Enter the domain name that is associated with SSO authentication. This is likely your company domain (companyabc.com).
- Choose a default role for SSO users. This is the role all new users will be assigned when their account is created.
- Copy the fields from Okta into runZero.
- Issuer URL - In this field, enter the Identity Provider Issuer URL from Okta. This will look something like
http://www.okta.com/<ID> - Sign-in URL - In this field, enter the Identity Provider Single Sign-On URL from Okta. This will look something like
http://<okta-instance>/app/<app-name>/<ID>/sso/saml. - Certificate - Copy and paste the entire contents of the X.509 certificate from Okta.
- Issuer URL - In this field, enter the Identity Provider Issuer URL from Okta. This will look something like
- Apply your SSO settings.
Step 3: Add users to the runZero App in Okta
Now that you’ve completed the set up, you can go to the runZero app in Okta to add and manage user access. After you’ve completed this step, your users will be able to go to your SSO sign-in URL to access runZero.
Step 4: Update SSO group mappings to match any configured Okta groups (if applicable)
If you have created user groups within Okta, you will need to update your SSO group mappings in runZero to associate the groups created in Okta with user groups in runZero. This will ensure that the appropriate access and permissions are added to your users when they sign in to runZero.